

I have made a lot of jello over the years, and nothing gets people leaning over my counter quite like a tray of layered jello cups. There is something about those clean, stacked ribbons of color that makes a five-ingredient dessert look like it belongs in a bakery window. And the best part? They are genuinely easy. If you can boil water and wait a little, you can make these.
These are my go-to for birthday parties, potlucks, and honestly just a random Tuesday when I want something pretty in the fridge. Below I will walk you through my exact layering method, the timing that keeps the layers sharp instead of bleeding into each other, and a handful of variations, including a sugar-free version and a lidded, grab-and-go format for travel.
Why You’ll Love These Layered Jello Cups
- They look impressive but take almost no skill. The “wow” is entirely in the layering, and I will show you how to nail it.
- Fully make-ahead. Build them a day or two before your event and pull them straight from the fridge.
- Endlessly customizable. Any color combo, creamy or clear, mini or full-size, dressed up or plain.
- Naturally portable. Individual cups mean no cutting, no serving spoon, no mess. Add a lid and they travel beautifully.
What You’ll Need
The two-tone look comes from alternating a clear fruit layer with an opaque creamy layer. Here is what goes into a batch of about 8 cups:
- 3 boxes fruit-flavored gelatin dessert mix, 3 oz each, in three colors you like together (I love a berry-to-citrus fade)
- 1 envelope unflavored gelatin (this is what sets your creamy layers)
- 1 cup sweetened condensed milk, or 1 cup plain Greek yogurt loosened with 2 tablespoons warm water and a spoon of sugar
- Boiling water and cold water (amounts on your gelatin boxes)
- 8 clear cups or small glasses, so the layers actually show
Prefer to skip animal gelatin? A plant-based setting mix works too; just follow the setting ratios on that package, since they set a touch differently.
The Cups Matter More Than You’d Think
Clear is the whole point here, so reach for glass tumblers, clear plastic tumblers, or short mason jars. Straight-sided cups give you those crisp horizontal bands; angled or tapered cups create a fun diagonal effect if you tilt them while setting (more on that trick below). If you want a lidded option for transport, grab clear plastic cups with matching dome or flat lids, which I get into in the variations.
How to Make Layered Jello Cups, Step by Step
- Mix your first clear layer. Dissolve one box of fruit gelatin in boiling water per the package, then stir in the cold water. Let it cool on the counter for about 10 minutes so it is warm, not hot.
- Pour the first layer. Divide it evenly among your cups, about an inch deep. Refrigerate until just set and tacky to the touch, usually 25 to 30 minutes. You want it firm enough that the next layer sits on top instead of sinking in.
- Make your creamy layer. Sprinkle the unflavored gelatin over 2 tablespoons cold water and let it bloom for 5 minutes. Warm the sweetened condensed milk (or the yogurt base) gently, whisk in the bloomed gelatin until smooth, then let it cool to room temperature. This cooling step is non-negotiable; a hot creamy layer will melt the set layer underneath and muddy your lines.
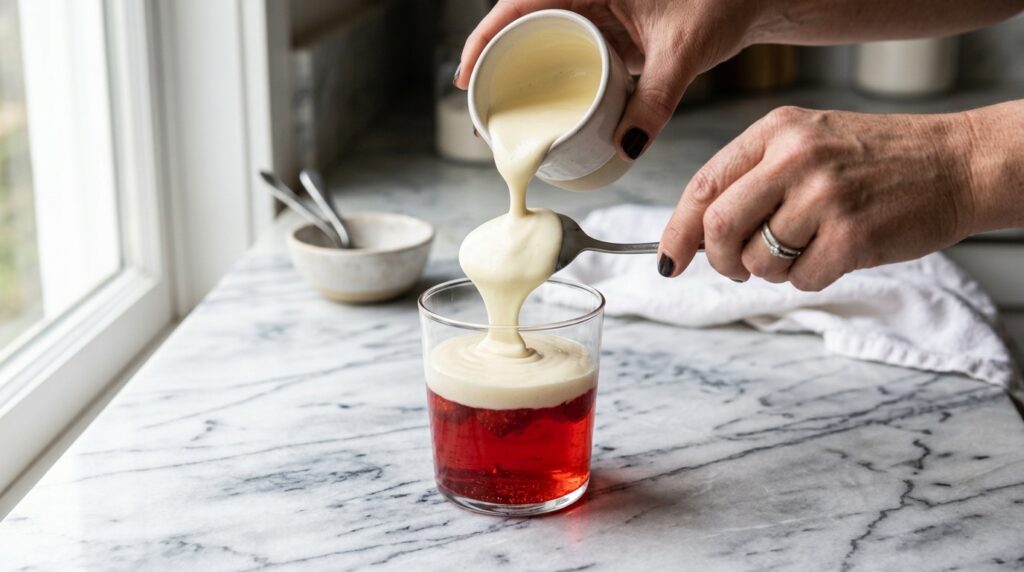
- Add the creamy layer. Spoon it gently over the back of a spoon onto the set fruit layer so it does not punch through. Chill 25 to 30 minutes until set.
- Keep alternating. Repeat with your next fruit color, then creamy, then your last color, cooling each mixture and letting each layer set before the next. Patience here is the entire recipe.
- Final chill. Once your last layer is on, refrigerate at least 2 hours, or overnight, so everything is fully firm before serving.
My Tips for Clean, Sharp Layers
- Warm, not hot. Every layer should be at room temperature before it meets a set layer. Hot mixtures bleed; cool ones stack.
- Tacky, not liquid. Touch-test the layer below with a clean finger. If it springs back and feels tacky, you are good to pour.
- Pour over a spoon. Letting each new layer trickle over the back of a spoon breaks the fall and keeps the surface below intact.
- Want diagonal stripes? Rest the cups at an angle inside a muffin tin or egg carton while each layer sets, then straighten them for the next color. It looks fancy and takes zero extra effort.
- Wipe the rim. A quick pass with a damp paper towel between layers keeps the inside of the glass clean and the finished cup crisp.
Fun Variations
Sugar-Free Layered Jello Cups
Swap the regular gelatin boxes for sugar-free ones and use plain Greek yogurt (thinned with a little water) sweetened with your preferred sugar substitute for the creamy layers. The set is nearly identical, and the layers stay just as sharp. This is my most-requested version for gatherings where I want a lighter option on the table.
Mini Layered Jello Cups
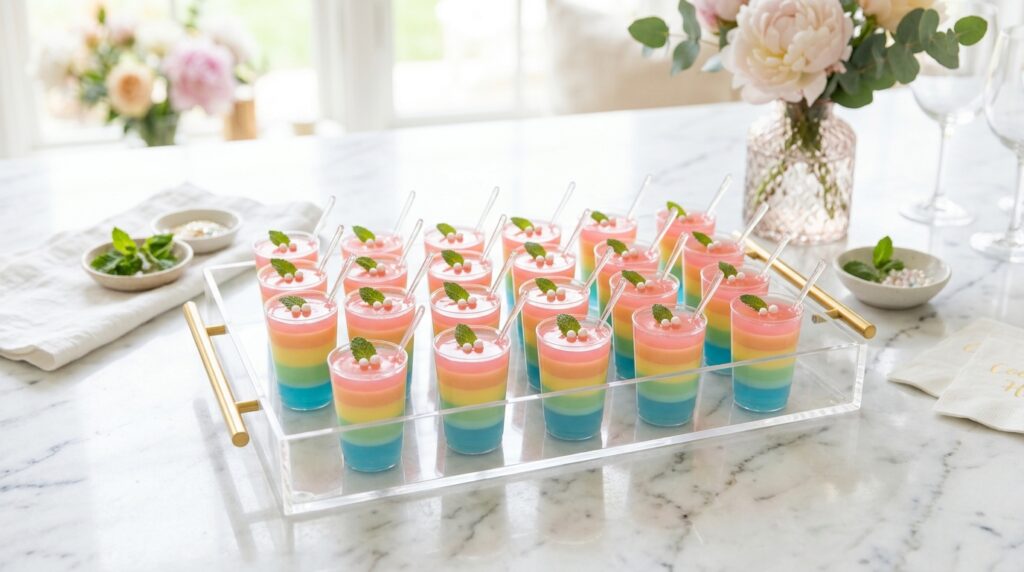
For parties, I make these in 2-ounce shot glasses or small tasting cups. Everything is the same, just scaled down: pour thinner layers (about half an inch), and shorten the set time to 15 to 20 minutes per layer since less volume firms up faster. A tray of mini cups disappears fast, so make more than you think you need.
Cups With Lids for Travel
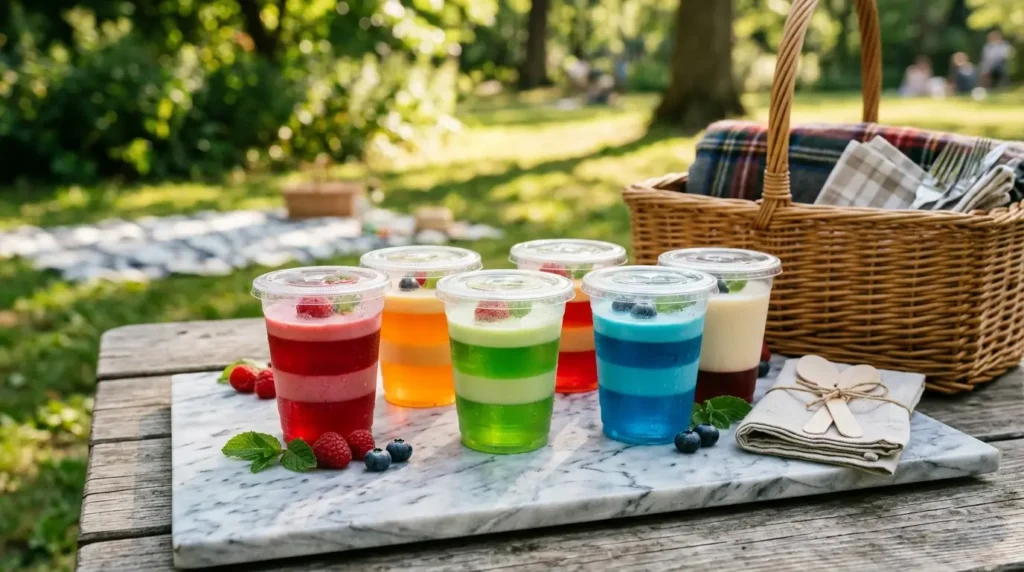
If you are bringing these to a picnic, a classroom party, or packing them into lunches, build them directly in clear plastic cups with snap-on lids. Leave about half an inch of headspace at the top so the lid does not smear your final layer, chill them fully before lidding, and keep them upright in a cooler. They hold their shape for a good few hours out of the fridge, which makes them one of the easier desserts to transport without a meltdown, literally.
Extra Ideas
Fold a little whipped topping into the creamy layer for a mousse-like feel, tuck a few pieces of soft fruit into the clear layers, or finish with a swirl of cream and a berry on top. If you love the creamy-layer texture, you may also want to try my sugar-free cheesecake jello, which leans fully into that soft, creamy side. For potluck-style salads built the same way, my jello salad recipe guide covers Watergate, ambrosia, and strawberry pretzel versions. And for more ways to turn a simple box of gelatin into something party-worthy, my roundup of healthy jello desserts has plenty of directions to take it.
Make-Ahead and Storage
Layered jello cups are a make-ahead dream. Build them up to 2 days in advance and keep them covered in the fridge. Stored properly they hold their texture for 4 to 5 days. I do not recommend freezing them, as gelatin turns weepy and grainy once thawed. If you are using cups with lids, they double as your storage container, which is one less thing to wash.
Frequently Asked Questions
What's the best way to layer jello cups?
The reliable method is one layer at a time, letting each layer set until tacky before adding the next, and always pouring a cooled mixture over the back of a spoon so it does not break through the surface below. Rushing is the only thing that ruins them; if you give each layer its 25 to 30 minutes, clean lines are basically automatic.
How long should each layer set before I add the next?
Plan on 25 to 30 minutes in the fridge for standard-size cups, or 15 to 20 minutes for mini cups. You are not waiting for fully firm, just tacky and set enough to support the next pour. And remember the new layer needs to be at room temperature, not warm, or it will melt into the one below no matter how long you waited.
Can I make sugar-free layered jello cups?
Yes, and they turn out great. Use sugar-free gelatin boxes for the clear layers and a Greek yogurt base sweetened with your preferred sugar substitute for the creamy layers. The setting behavior is the same, so your timing and technique do not change at all.
How do I make mini layered jello cups?
Use 2-ounce shot glasses or small tasting cups, pour each layer about half an inch deep, and cut the set time down to 15 to 20 minutes per layer. Mini cups are perfect for parties because they are pre-portioned and travel well on a tray.
Can I make these in cups with lids for travel?
Absolutely. Build them right in clear plastic cups with snap-on lids, leave about half an inch of headspace so the lid does not touch your top layer, chill them completely before adding the lid, and keep them upright and cool during transport. They hold up for several hours out of the fridge, which makes them ideal for picnics and lunchboxes.
Is there a "nasty ingredient" in Jell-O I should know about?
The ingredient people usually ask about is the artificial color that gives classic gelatin its bright cherry and berry tones, mainly Red 40 and, historically, Red 3. These are regulated food dyes, and the landscape is shifting: the FDA revoked the authorization for Red 3 and is working with the food industry to phase out several other petroleum-based synthetic dyes, with Jell-O's own manufacturer having committed to removing artificial colors from its U.S. products. If you would rather skip synthetic dyes altogether, you have easy options: choose a brand colored with fruit and vegetable extracts, or make your clear layers from unflavored gelatin set with 100% fruit juice, which gives you soft, natural color and a cleaner label.

Layered Jello Cups: Rainbow Layers That Actually Set Clean
- Total Time: 4 hours 30 minutes
- Yield: 8 cups 1x
Description
Easy make-ahead layered jello cups with clean rainbow layers — alternating fruit and creamy layers that set sharp every time. Perfect for parties, potlucks, and lunchboxes.
Ingredients
- 3 (3 oz / 85 g) boxes fruit-flavored gelatin dessert mix, in 3 colors you like together
- 3 cups boiling water (1 cup per box)
- 2¼ cups cold water (¾ cup per box, for firmer layers that hold clean edges)
- 1 envelope (2¼ tsp) unflavored gelatin
- 2 tablespoons cold water, to bloom
- 1 cup sweetened condensed milk (or 1 cup plain Greek yogurt loosened with 2 tbsp warm water + 1 tbsp sugar)
Instructions
- Mix the first fruit layer by dissolving 1 box of gelatin in 1 cup boiling water until fully dissolved, then stir in ¾ cup cold water. Cool about 10 minutes until warm but not hot.
- Divide among 8 clear cups, about 1 inch deep. Refrigerate for 25–30 minutes until set and tacky to the touch.
- Sprinkle the unflavored gelatin over 2 tablespoons cold water and let it bloom for 5 minutes.
- Gently warm the sweetened condensed milk, whisk in the bloomed gelatin until smooth, then cool to room temperature.
- Spoon the cooled creamy mixture over the back of a spoon onto the set fruit layer.
- Refrigerate the creamy layer for 25–30 minutes until set.
- Repeat with the next fruit layer, then creamy layer, then the final fruit layer, cooling each mixture before pouring and allowing every layer to fully set.
- After the final layer, refrigerate for at least 2 hours or overnight until completely firm.
- Serve chilled.
Notes
Every layer must be at room temperature before pouring, or it will melt the layer below and blur the lines. For diagonal stripes, rest the cups at an angle in a muffin tin while each layer sets. Sugar-free version: use sugar-free gelatin and a sweetened Greek yogurt base. Mini cups: pour ½-inch layers and set 15–20 minutes each. A plant-based setting mix works too; follow the package ratios. Store covered in the refrigerator for up to 4–5 days. Do not freeze, as gelatin becomes weepy after thawing.
- Prep Time: 30 minutes
- Cook Time: 4 hours
- Category: Dessert
- Method: No Cook
- Cuisine: American
Nutrition
- Serving Size: 1 cup
- Calories: 70
- Sugar: 16g
- Sodium: 35mg
- Fat: 0g
- Saturated Fat: 0g
- Carbohydrates: 17g
- Protein: 2g
Keywords: layered jello cups, jello cups, layered jello, easy party dessert